Page 14 of 18
Re: Got a Before & After to share? Let's see 'em!
Posted: Tue May 22, 2018 12:51 pm
by MJ1987
Gothichome wrote:MJ(Matt) that looks great, nice and tidy now. One problem though now that you’ve let the light hit them they have started to grow.
Thanks! The rock garden/hill on the front of the property drives me crazy. We tore our hands to shreds pulling out as much bittersweet, grass, and weeds that we could. It looked great in early May--only the flowers and some ground cover remained. Then the rains came (and are still coming). Then the sunny, humid days came...then......BOOM! The bittersweet roots sprung shoots and the whole things starts over again

I'm going to eventually do it over, but pot the flower bulbs next year. Then I'll kill the whole shebang with RoundUp. I know it's pesticides, but that's what kills them so that's that. Then ill let eventually replant the bulbs and uncover the many boulders that have been buried by years of untamed overgrowth. I've got the vision in my head--looking forward to eventually getting there.
Stay tuned for the retaining wall pics!
Re: Got a Before & After to share? Let's see 'em!
Posted: Tue May 22, 2018 6:09 pm
by Manalto
You can avoid (or minimize) the use of Round-Up (glyphostate) in a couple of ways.
1. 10% acetic acid will burn off all but the waxiest foliage. Note that acetic acid doesn't kill systemically, so those plants that resprout from the roots may do so. However, a second application after the plant resprouts will usually do the trick by exhausting the roots.
2. If you're not able to remove the roots of bittersweet, try spot-treating the freshly-cut stem immediately with Round-Up (or equivalent). It's only a dab - you're not spreading it around - and it will kill the plant. You must treat the cut stem promptly because it doesn't take long for the tissue to begin to callous over.
Re: Got a Before & After to share? Let's see 'em!
Posted: Wed May 30, 2018 2:16 pm
by SouthernLady
I don't think I've posted about this here yet, but the front door exterior is now restored! I wrote about it on my blog, so I will spare you the details, but if you want to see how it all came about, just click
https://mccuistonhouse.com/1880s-front-door-restoration/.

It's hard to tell in the picture to the left, but the original front door was almost identical to the one I found. The picture on the right was taken roughly 15-20 years after the 1940s remodel. The daughter of the builder inherited the house and had the single-story wrap porch replaced with a Mt. Vernon-style porch and screened in the portion that wrapped around the driveway side. It appears there was also a portion that wrapped around my bedroom window area as I have been finding remnants of brick footers there when I have been planting peonies. The great-granddaughter also told me she suspected this for that very reason.
Here's the door in place right before Christmas:

I still have to do the interior-side of the door, but that will happen when I get around to tackling the parlor.
For now, I must finish setting up the old shed/carriage barn as the living room since I rescued a four-week-old kitten last week. Someone threw out four kittens just below my house last Friday, and I almost ran them over when they jumped out in front of my car. It took six hours with a friend of mine and two more ladies who answered my community Facebook page SOS, but we finally caught the last one at 1:10 AM Saturday morning. That stubborn kitten was appropriately named Rascal, and he is the one who now lives with me. I was able to find homes for the other three within 24 hours, and I am glad to say they are all doing extremely well and are happy. Pictures are on the bottom of my blog.
http://www.mccuistonhouse.com
Re: Got a Before & After to share? Let's see 'em!
Posted: Thu May 31, 2018 12:42 pm
by Gothichome
Southernlady, your new door looks great, a fantastic upgrade, even has wavy glass, bonus.
You didn’t mention on your blog but did you have to do any customizing so the door would fit?
Re: Got a Before & After to share? Let's see 'em!
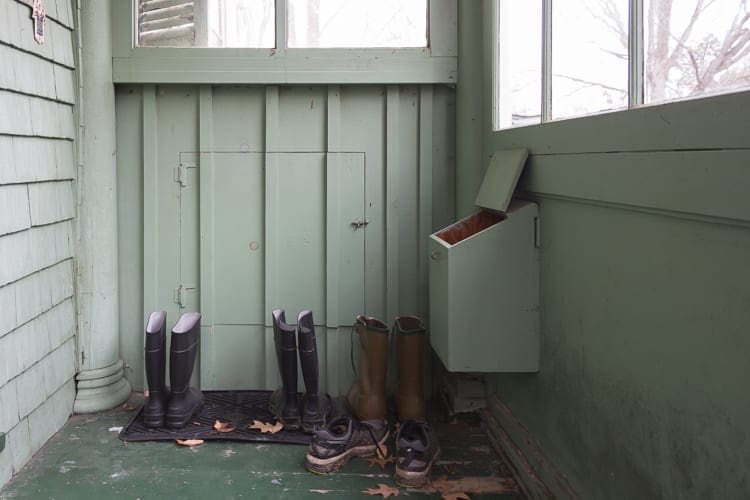
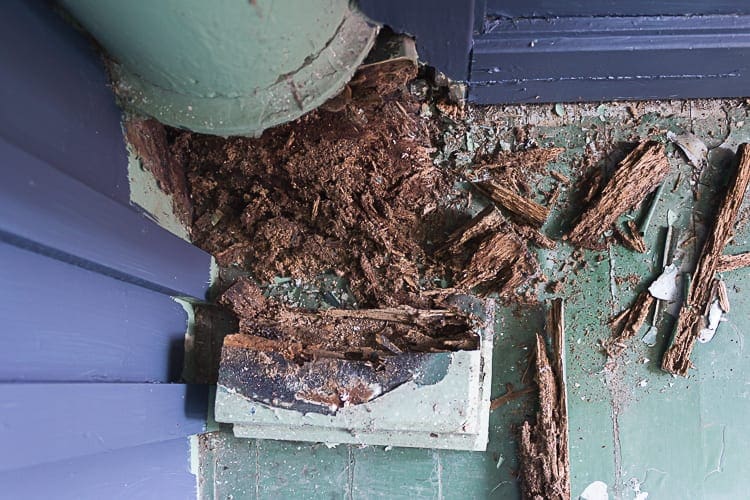
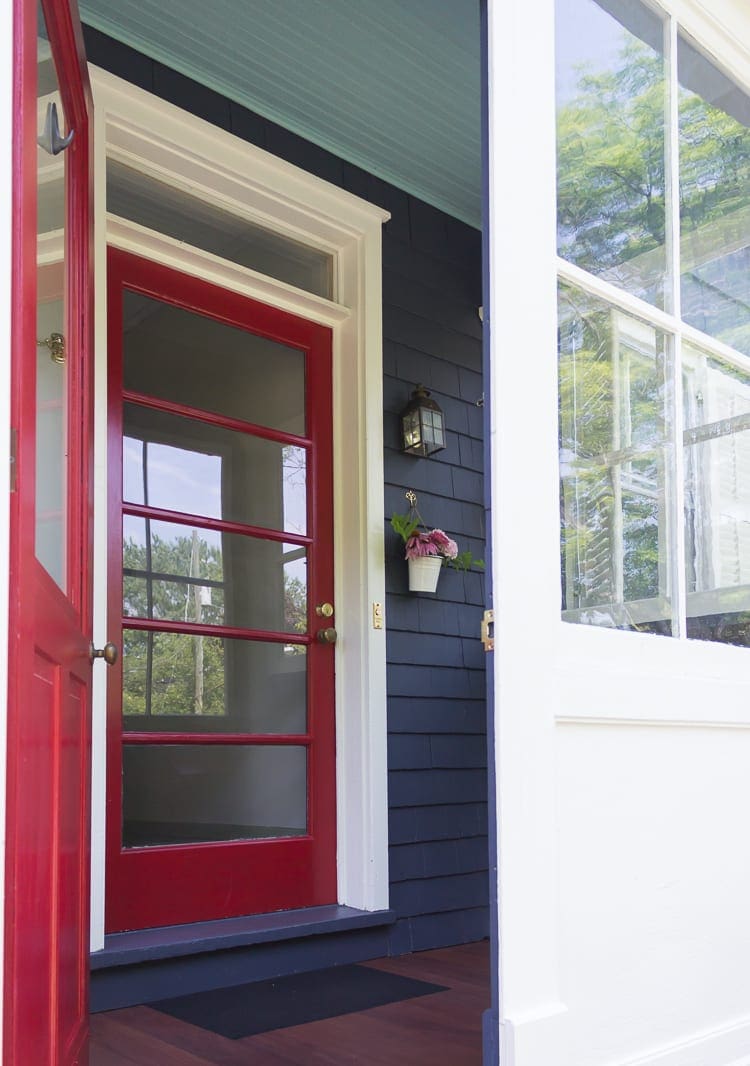
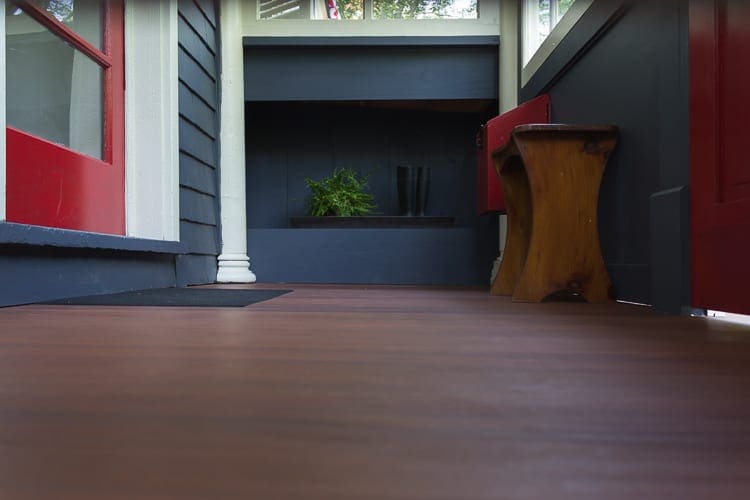
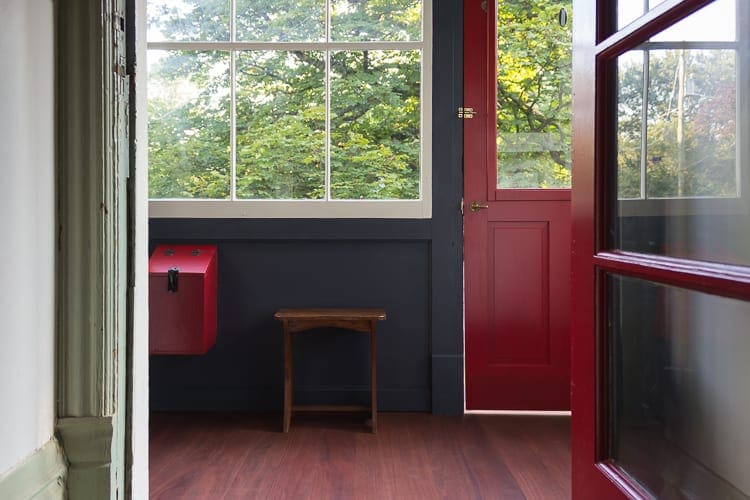
Posted: Tue Sep 11, 2018 9:48 pm
by BlakeHillHouse
Re: Got a Before & After to share? Let's see 'em!
Posted: Wed Sep 12, 2018 12:13 am
by Gothichome
Wow, what a world of difference. How did you handle the rotted out column base?
Re: Got a Before & After to share? Let's see 'em!
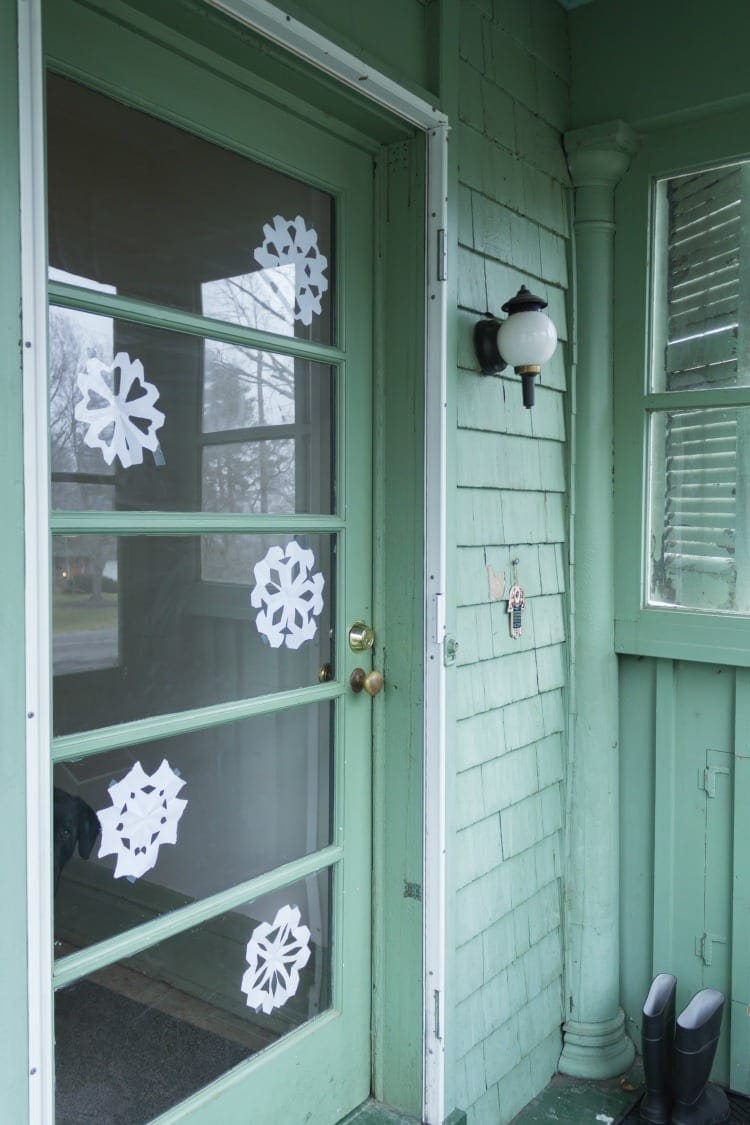
Posted: Wed Sep 12, 2018 3:57 pm
by BlakeHillHouse
Gothichome wrote:Wow, what a world of difference. How did you handle the rotted out column base?
I salvaged the upper ring portion, and I built new square bases out of pressure-treated wood. The original bases were circular and visible on the photos of the interior of the porch. However, the replacements that I was replacing were square, and I just replicated them. That squared-off profile worked the best since the porch is now enclosed. I suspect it was enclosed sometime between 1940 and 1960.
Re: Got a Before & After to share? Let's see 'em!
Posted: Wed Sep 12, 2018 4:37 pm
by Manalto
I like the glass door with the five horizontal panes. Unusual. The red gives it presence.
Re: Got a Before & After to share? Let's see 'em!
Posted: Wed Sep 12, 2018 11:40 pm
by Gothichome
Manalto wrote:I like the glass door with the five horizontal panes. Unusual. The red gives it presence.
It sure does,
Re: Got a Before & After to share? Let's see 'em!
Posted: Thu Sep 13, 2018 3:19 am
by Willa
[quote="BlakeHillHouse" Here is the latest project. It's not a restoration, but I made do with what we had, and I replaced the rotten floor and pillar bases. I also swapped out the fixtures for more period-appropriate ones.
Boy, what some elbow grease and a few coats of paint can do ! Your improvements look fantastic. I had to go back and check your before photos to see that was the original door. It looks really fresh, in a color combination that works really well.