Craftsman Kitchen Renovation Beginnings

Project updates and progress reports
phil
Has many leather bound books
Posts: 4616
Joined: Tue Aug 18, 2015 6:11 pm
Location: Near Vancouver BC

Re: Craftsman Kitchen Renovation Beginnings

Post by phil »

I took a few pics in a mad dash out the door. I could have put more lights on to improve resolution and you will have to ignore the fact the tip out panel under my sink is missing. I need to attach the stainless tray that will be for scrubbies and things.

The sideboard, if that is what it is called is what I think of as authentic to the era and if yoiu really wanted craftsman style I'd strive for that sort of panel construction. I think it is from near the 20's and I have the table that matches it.

my cabinets are a bit of a mixture of old and new methods, dovetail drawers and old style drawer slides. I did use the self closing euro hinges. I probably could have tinted the panels a bit deeper. the grain on the thin ply I used for the panels isnt' as exciting as the wood I used for the panels and frames.

You can see how I tucked the hood fan and blower out of sight and extended the uppers and the lowers. My plan is to continue around to the right with a narrow depth cabinet and that will also face off that wall and allow access to the deep cubby holes ( not really shown)

my kitchen is big but I prefer not to fill the space with cabinetry although I could use a it more counter space, I figured at least its cleaned up for now and usable and I can progress as time allows. I have some of the parts like drawers made up.

the ceiling above my run of cabinets is lower than the rest of the kitchen because at ne time they lifted the roof and pushed the wall out about 4 feet.

to the right near the sink is the fridge ( nice and close is handy) the wall to the left has a window and door and I left it unencumbered by the cabinetry. If I wanted to blow the wall out I could extend the eating area, but an addition is not planned. Its really pretty functional for the two of us.

I put a food waste disposal in the sink and not much extra bling. I made a vent below the sink for the heat to exit and that's a great location as it warms your feet at the sink. I put three pot lights above. and above the table I have some big lamps from the 70's that are bright and Ill find something more antique eventually.

you can see with these cabinets, they are face frame. the cupboard doors and the drawers close so everything is pretty much even. I went pretty tight with all the gaps. the drawers have to fit pretty close so that they dont interfere with each other if you pull more than one out. If I did it again I'd add a breadboard , maybe even two.

my dad hand cut the dovetails and got me going on building the drawers, he did the ones on the right. I did the ones on the left using a dovetail jig.

I can go into he details of the drawer slides etc if you are building something similar you can take comparisons. I wished the lighting was better for the pics to show how brilliant the grain is on the edging, some of it had really exciting grain and the finish really made it pop. although there is tonal variation i kind of like it not being all monotone.


you might note that the panel on the right side of the uppers is made as a panel not a hunk of plywood. the parts either side of the stove are plywood as they are hardly seen. You cna't see the cabinet ends because they go up to the walls. It consists of three boxes. If you used out of the box cabinetry it would have more plywood separating the boxes than necessary for it's structure, that's the way they do them now.

I originaly configured the cabinet to be an island.. I really didnt want o use up all the center of the room with a cabinet so after my separation I cut the thing down to fit as it is now. If I made an island Id make it moveable which means no sink in the island. It is a trend do that now and thats what you want if you do cooking shows for your guests. I also hate stools. I find them a temporary seating arrangement that is never really comfortable but they are used often to sit people at the back of islands to maintain the counter height sort of eating area. you will see they in a lot of modern kitchens. I find it looks nice visually but I hate sitting adults on high chairs Its a space saving workaround so people can sit at their islands. great for the real estate photos, not so good in reality in my opinion.

I left space thinking I could build a nook sort of like a bench seat in a diner along in front of the window. it wouldn't be exactly centered under the window unless I modify the window too.
there is a lot of room in the center so I can have a big table with a dozen people if I care to. we just had a family party so I removed all the chairs from the kitchen and put 10 chairs in the living room so we ( she) made sandwiches and soup and of course pie.. ;-) that was a bit more casual than putting them all around a table and we enjoyed sitting around the fire.

the windows you see were messed up , they had removed the original trim and cut the sills flush to the walls. I extended the sills and made the trim to match the others. the trim above the window is actually hollow boxes to save material but I liked the grain of that board so I split one 2x6 into 3 to make it work so they match. hard to see int he pics but I combined the window sill ( behind the old cabinet) with a wainscot cap so the same trim runs across the sill and also functions as the wainscot cap. the wainscott is the only MDF, I just couldnt' afford the fir stuff at the time I did it so I painted the MDF wainstcott.

I'm missing the trim piece below the two windows on the right. As you see there isn't a lot of space for a big backsplash. I forget that its missing but it should have something to prevent any spills going down the back it only really needs a simple thin wood strip to stop any water from going back there.

we dont use the microwave a lot we are thinking of relocating it but that's how it is today anyway.

there is probably some merit to doing a scale drawing and experimenting a bit with the layout to find possibilities and make choices. some have a great talent for visualizing colors and how things could fit together. for me if I can visualize it I can build what I imagine but Its a bit of an art to visualize good ideas and see things like drawer interference as mentioned earlier.

I didn't need a lazy suzan since I had no corners like that. I want the cabinetry that will extend to the right to incorporate most of the fridge. I had two pantries that weren't built like anything too special so I pulled one out so I could stick my huge fridge in there. otherwise the fridge seemed so overpowering. now it sticks out a foot so I can make all that flush with the cabinetry.

my fridge is stainless the dishwasher and stove are white. I'm not that particular about that I consider appliances to be temporary items anyway.

i went with butter yellow. I have some wainscot on two walls and I painted that the orangy color.. it sort of matches the wood colors. the ceiling I put just a tad of the yellow into white so you really cant' see the division where the yellow walls transfer into the white ceiling due to the way the colors reflect.

when I bought the house the whole ceiling was dropped to 8 feet. I removed the dropped ceiling to get the 9 foot ceiling back. just the bit at the end above the cabinets needed to stay at 8' I turned the whole thing , there was something nice about the sink facing the back yard but now that wall is unobstructed by cabinetry , sort of a trade off there.

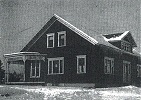
the 50's cabinets were pink and salmon and they had done a crackled finish green sponge painted walls. I hate pink and we had that is different shades. the counters were tile but they used tile that was rounded over near the cracks so any spill went like a network of channels in the grout. It was horrible. I took all the walls apart and tackled the insulation and electrical before I built the kitchen. you can't have too many plugs. code requires a breaker for every plug so those 4 outlet boxes have 4- 15 amp breakers for example. if you look you'll find there are also some rules about how many plugs per foot of counter space. I just put lots and I would encourage that if you have room in the panel or if you can support a subpanel. most of the power requirements for a modern home are in the kitchen. In rooms like living room and bedrooms we dont use as many high amp appliances more lamps and radios and things, so some of those can be daisy chained. the code required spark fault breakers for bedroom plugs. arc fault breakers are for the outside plugs, the razor plug in the bathroom has its own ground fault protection device.

the floor was pretty chopped up so I took it all apart and patched a few areas restored the floor and did oil then poly. It had a lot of black nails so I bleached the floor then carefully dyed it with a tiny bit of stain until it matched the rest of my flooring. I restored all the floors on the main floor and the attic in a similar way so they all match they had all sorts of various layers of tile and stuff in there. .. only exception is the bath which needs a gut job. I have a few dents and marks the fir isnt' super hard but I like having the real wood floors back. Originally the kitchen had green battleship jute backed lino I believe.

I did not have a bathroom fan. I added a vent for it when I did some roofing so now I need to ad the vent in the bath and the fan I think I'll put in the attic in line with the vent so I can use an old style vent without the fan included.

If you go to a real lot of effort in cabinetmaking there could be somethign to making some of them free standing. If you really put your heart into the project then move, you could then choose to keep some of them.

Phil
Attachments
pic5.jpg
pic5.jpg (202.08 KiB) Viewed 2037 times
pic4.jpg
pic4.jpg (151.31 KiB) Viewed 2037 times
pic3.jpg
pic3.jpg (179.85 KiB) Viewed 2037 times
pic2.jpg
pic2.jpg (178.05 KiB) Viewed 2037 times
pic1.jpg
pic1.jpg (179.34 KiB) Viewed 2037 times

User avatar
awomanwithahammer
Knows where blueprints are hidden
Posts: 911
Joined: Fri Jan 22, 2016 1:19 am
Location: Maryville, TN

Re: Craftsman Kitchen Renovation Beginnings

Post by awomanwithahammer »

Really nice-looking, Phil. I like your inset drawers and doors. That is definitely an art! And you're right, the grain is beautiful. You wouldn't even know you had a fan over the stove except from the bottom.
Bonnie

User avatar
nhguy
Stalwart
Posts: 362
Joined: Fri Sep 04, 2015 12:33 pm
Location: Far Northern NH

Re: Craftsman Kitchen Renovation Beginnings

Post by nhguy »

Those are some nice looking cabinets. I second the hidden range hood in the cabinet, very well done. We have an old Arts and Crafts buffet from J. K. Rishel in tiger oak. It's a beauty, but my wife thinks the stain would be too dark to copy for our kitchen cabinets. I wish I had your talents in woodworking.

User avatar
Willa
Revered expert in almost everything
Posts: 1369
Joined: Tue Dec 06, 2016 9:46 pm

Re: Craftsman Kitchen Renovation Beginnings

Post by Willa »

Manhattan Nest just did a kitchen on a limited budget. The configuration is not dissimilar from yours, NH Guy. He has a play by play of what they did, and how much the materials cost. I really like that they took out the lowered ceiling, re-used the cabinet boxes, and made the original window the focus of the room. I also really love that the cabinets go all the way to the ceiling. I don't love the tiles or the concrete counters - but - it's not my kitchen. Anyhow - maybe this will be helpful as inspiration for you ?

https://manhattan-nest.com/2019/11/25/burgevin-gardens-kitchen-makeover-the-big-reveal/

Before:

before2-1-600x800.jpg
before2-1-600x800.jpg (124.83 KiB) Viewed 2021 times


After:

After2-600x800.jpg
After2-600x800.jpg (106.53 KiB) Viewed 2021 times

User avatar
nhguy
Stalwart
Posts: 362
Joined: Fri Sep 04, 2015 12:33 pm
Location: Far Northern NH

Re: Craftsman Kitchen Renovation Beginnings

Post by nhguy »

WOW! Sorry to shout. That's amazing, truly. Thanks for posting this as we have made few if any decisions. We are really gathering ideas and married to nothing except making the new kitchen blend with the rest of the home. It's always a challenge, but when you get it right, like the kitchen you posted you just know it.

User avatar
GinaC
Forgotten more than most know
Posts: 437
Joined: Sat Jan 26, 2019 8:19 pm
Location: Newport, VT

Re: Craftsman Kitchen Renovation Beginnings

Post by GinaC »

All of these photos make me wish that I had bought a counter-depth refrigerator. :cry: I was very limited by width, though.
1939 Minimal Traditional

phil
Has many leather bound books
Posts: 4616
Joined: Tue Aug 18, 2015 6:11 pm
Location: Near Vancouver BC

Re: Craftsman Kitchen Renovation Beginnings

Post by phil »

nhguy wrote:Those are some nice looking cabinets. I second the hidden range hood in the cabinet, very well done. We have an old Arts and Crafts buffet from J. K. Rishel in tiger oak. It's a beauty, but my wife thinks the stain would be too dark to copy for our kitchen cabinets. I wish I had your talents in woodworking.


thanks for the compliment. I experimented with spraying dye. I liked how it enhanced the grain but I didn't choose to use any stain or dye. the lumber was maple"crating lumber" and very rough. I think if you get an idea what you want you can build it with a cabinet style tablesaw and a jointer. the rest is mostly patience, lots of great info and plans out there. a job well planned is half done. it might not be too much of a reach to try to build your own and keep your existing until you can make the switch. if you get the feeling you'd like to try you could read some of the posts in the woodworking forums where a lot of them have detailed their own progression with pictures and help from those more experienced. I think youll find some good ideas that way even if you dont choose to build them yourself. you could add a touch of your own ideas to factory made ones and embellish them a bit more.

I noticed that on the one Willa posted, the lower cabinets have doors that overlay the frames but the uppers are more like mine. if the doors overlay the frames then they don't need to fit the holes. If they fit the holes then they need to be more exact. you can make them a little oversize and trim to fit. some do doors that overlay and then just do the moldings in such a way that the edge molding is used instead of handles on the uppers. some choose to use fancy moldings and finials along the top to match other things such as crown moldings so you could perhaps look for other details in your own space and try to carry them into the cabinetry for a bit of continuity. someone wiht a bit of artistic talent and no cabinetry skills could also use things like intarsia or two chip carving. with both there are some fairly simple processes that are not so complex as 3D carving but produce quite interesting custom effects.. so for example you could add your own flair to some of the edging or make little masterpieces of the kitchen doors while sitting at a table and not need a wood working area or any fancy tools.

User avatar
nhguy
Stalwart
Posts: 362
Joined: Fri Sep 04, 2015 12:33 pm
Location: Far Northern NH

Re: Craftsman Kitchen Renovation Beginnings

Post by nhguy »

Phil,
I like the inset panel look of the top cabinets, best. The bottom cabinets, according to the article, are reused from the original kitchen. My research says inset doors and drawers cost about 30% more than overlay door and drawer cabinets.

phil
Has many leather bound books
Posts: 4616
Joined: Tue Aug 18, 2015 6:11 pm
Location: Near Vancouver BC

Re: Craftsman Kitchen Renovation Beginnings

Post by phil »

if you have several panels witht he same surface height you have less room for error if there is any racking of the cabinets or if they dont fit flat to the face frames it shows. an example is if a door is made not flat or out of plane. Not sure about price but the reason they do them that way is to simplify things and reduce price. If you were to sell your house I'm not sure if the buyer would necessarily make observations like that.
the other obvious trade off may be that initially you probably see the cost of the boxes but in reality as you are installing them in a place that wont be designed for standard cabinetry you may need to still resize things to fit your space. In a new home these things are planned from the start but in an old house you might tend up with some that need custom dimensions and then the maker may charge for such modifications. its a matter of what's best for you.
many use the under sink space for trash. I didn't want my cabinets to get all stinky and I have heat under the sink so it's warm under there and that isn't suitable for trash storage. Its nice if you have room for green waste, recycling and garbage and you could go further with separation. since these things will become more important with time I'd consider where they should live.

a very simple way to add a bit of an art deco look is to simply make some sawcuts in the front panel , often that was done to provide a vent. I think the original intent was to have a cool cupboard with an outside vent to store your veggies and things in.. now we tend to use refrigeration but still things like potatoes might do well in a cool dark place. often these slots are cut in a sort of increasing length or something It reminds me of empire state building architecture in a way, which is why I relate it to art deco even though it's incredibly simple.. just a few slots usually.

I tend to watch old movies and notice stuff like that in the background quite often instead of really paying attention..

In the space I put my fridge I considered trying to make the fridge stand in a semi cool space. we spend money to make the fridge cold even when it is cold out so I could see fridges becoming way more efficient with some perhaps heat condition controlled, outdoor venting to allow cool air near them could improve efficiency a great deal I think. I insulated the box mine is in it only has three walls and a top now but my thoughts were on track to install vents and perhaps fans to bring cool air around the fridge, making it run less often. they could perhaps be changed spring and fall or could have temp controlled flaps and things to do that based on inside and outside temp so no intervention was necessary. some put the fridge in a cooler space ( back room) but that's awkward unless its just for beer etc. I figured if I sort of surrounded the fridge with cabinetry I might have some control of the temp the actual fridge sits in. a barrier for the coils ( a baffle) might help get the heat outside during summer. the hot side is the coils, usually just the back, the cool side is basically the rest of it. humidity and rust are other factors since you wouldn't want to expose it excessive humidity.
i also thought about making the fridge and stove take woodwork overtop. Its possible but with my luck I'd finish that just in time for one of them to fail.
some appliances are made to accept different faces but then they are double in price. I did find a dishwasher with a glass door I figured I could mod because the glass was heavy.. many are pretty flimsy. the dishwasher makes a lot of humidity too.

User avatar
Willa
Revered expert in almost everything
Posts: 1369
Joined: Tue Dec 06, 2016 9:46 pm

Re: Craftsman Kitchen Renovation Beginnings

Post by Willa »

nhguy wrote:WOW! Sorry to shout. That's amazing, truly. Thanks for posting this as we have made few if any decisions. We are really gathering ideas and married to nothing except making the new kitchen blend with the rest of the home. It's always a challenge, but when you get it right, like the kitchen you posted you just know it.


He has a new post where he goes into detail about how he re-used the existing cabinet carcass' (I feel so strange using that word but that's what they're called, right ?), and made the best use of what was already there.

It all seems pretty sound except for painting the cabinets with a latex paint. I would NOT do that. I swear by Benjamin Moore Advance, which is a water based alkyd, that dries to a hard enamel finish. It's a little pricey but it's an excellent product. I really don't like how most latex paints remain a little gummy when used on a non-wall/non-ceiling surface.

https://manhattan-nest.com/2019/12/18/5-ways-to-add-new-life-to-old-cabinets/

The photos are really helpful to understand how the cabinets were reconfigured. I think it's a really sensible approach. Your cabinets look like they are from the 50's or early 60's - so they are probably well built from wood, and would probably withstand modifications ?

Post Reply